

(Psst: The FTC wants me to remind you that this website contains affiliate links. That means if you make a purchase from a link you click on, I might receive a small commission. This does not increase the price you’ll pay for that item nor does it decrease the awesomeness of the item. ~ Daisy)
I rarely buy kitchen gadgets unless they serve multiple purposes. I had looked at ice cream making machines but decided they cost too much money with not enough function.
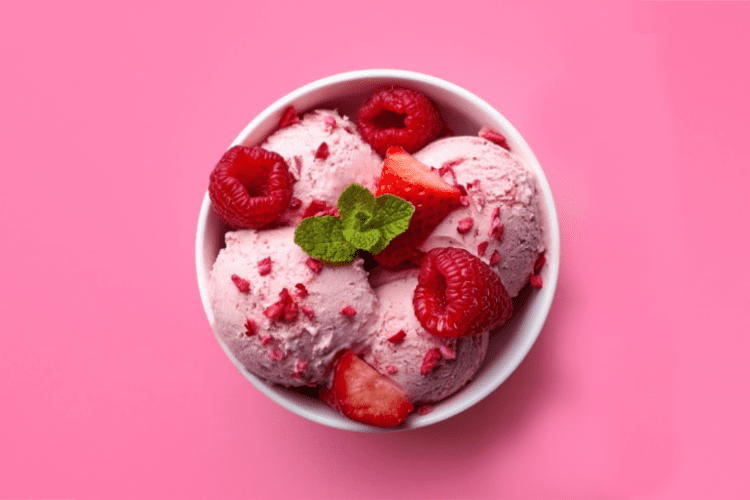
You can make homemade ice cream with just a hand mixer!
When I had a windfall of raw milk a couple of weeks ago, I decided to try to make ice cream, despite my lack of “machinery”. This will work equally well with pasteurized whole milk and cream from the grocery store. Two batches later, we ended up with a cold delicious treat made from fresh, pure ingredients. It takes a few hours, but very little of that is actual hands-on time.
If you have a hand mixer, homemade ice cream can be yours!
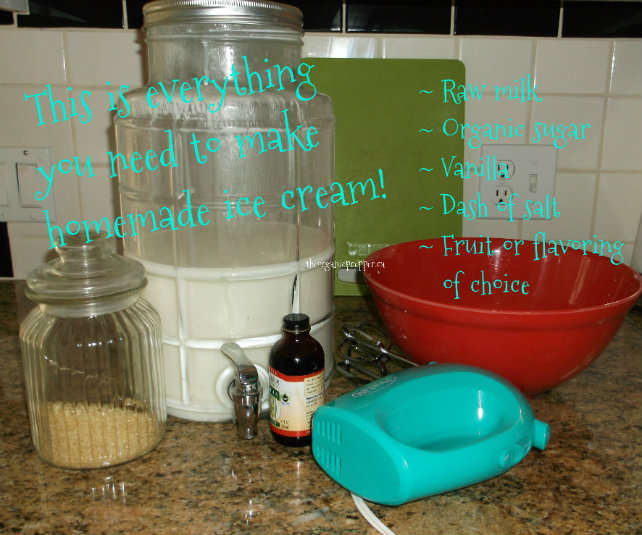
You will need:
- 2 cups of milk
- 2 cups of cream ( For even richer ice cream, use 4 cups of cream and no milk)
- 1 cup of sugar
- 1/2 teaspoon of vanilla extract
- a dash of salt
- Optional: Fruit, nuts, chocolate, etc….the sky is the limit!
- a hand mixer
Directions:
1.) In a large mixing bowl, combine all of the ingredients except your optional add-ins. Using a hand mixer, beat the ingredients for 1 minute.
2.) Put the bowl in the freezer and set a timer for 30 minutes.
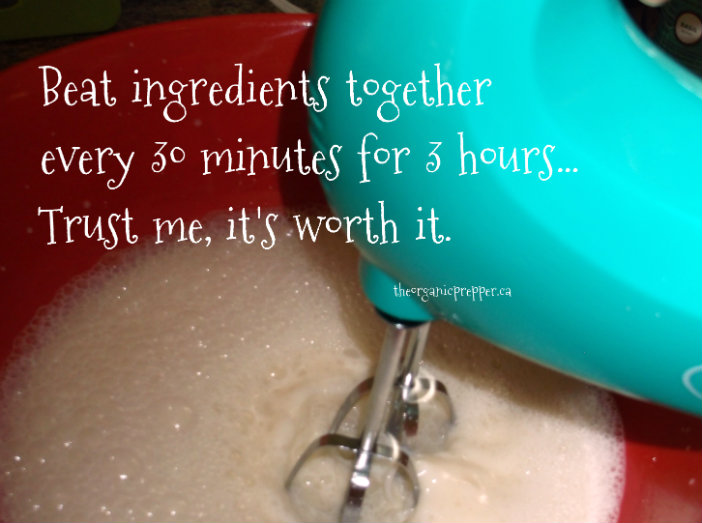
3.) When the timer goes off, remove the bowl from the refrigerator and beat the soon-to-be ice cream for another minute. Return the bowl to the freezer.
4.) Repeat this every 30 minutes for 3 hours. It sounds like a lot of work, but in all, it’s only 6 minutes. Totally worth it.
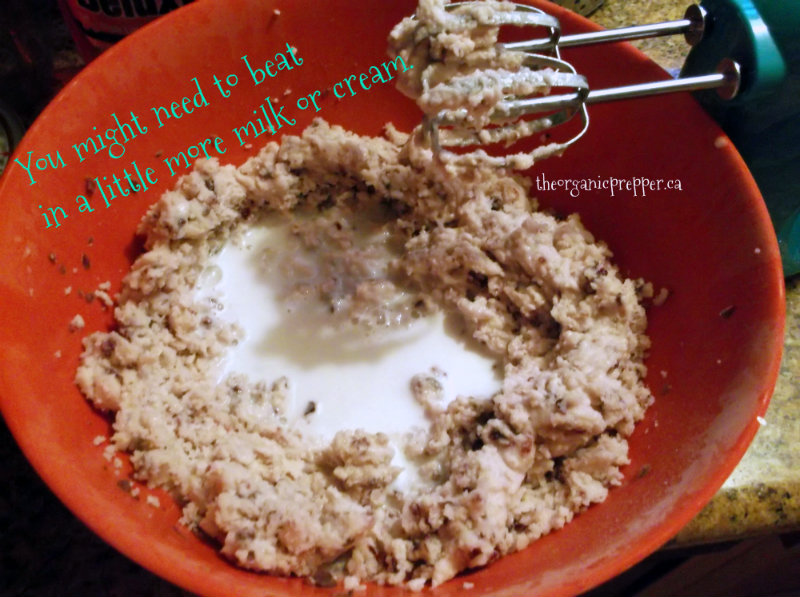
5.) At the end of three hours, you will have a somewhat “slushy” texture. Now is the time to add your goodies. For best results, chop your fruit or whatever delicious thing you’re adding into small pieces. Add about 1 cup of deliciousness and beat the mixture for one minute. Return the bowl to the freezer, and this time set the timer for an hour.

6.) In an hour, use your mixer to beat the mixture again for a minute. If the texture is “flakey” instead of creamy, you can add a little bit more milk.
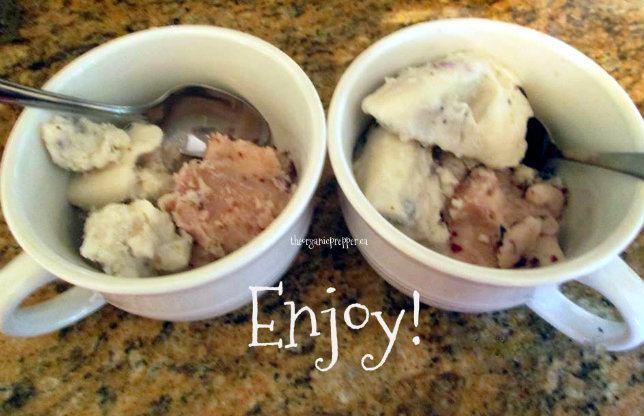
And that’s it!
Your homemade ice cream is ready!
Other Homemade Ice Cream Tips
If you have any ice cream left over, transfer it into a covered dish and return it to the freezer. The next time you are ready to eat ice cream, set the bowl in some warm water to soften it slightly before dipping it out.
For an even richer ice cream, 4 cups of cream and no milk. You can also use half and half in place of all the milk and cream. I haven’t tried this with non-dairy milk but see no reason why it wouldn’t work.
Have an ice cream social
Don’t stop at simply serving ice cream. Dress it up!
- You can find out how to make homemade chocolate syrup HERE.
- Add sprinkles or candy
- You can use jam that didn’t set quite as much as you might have liked as a fruit topping.
- For add-ins, chop them into small pieces before you mix them in. Try nuts, chocolate chips, a candy bar, or fruit.
If you have an ice cream maker, you can learn how to make delicious and wholesome ice cream HERE.
Are you going to make some homemade ice cream?
This is a great activity to do with the kiddos and the long-waited reward makes the ice cream taste even sweeter. Are you going to give it a try? What flavor? Let’s talk about it in the comments.


12 thoughts on “How to Make Homemade Ice Cream with a Hand Mixer”
What about home made strawberry syrup?
Can’t wait to try this.
I’m a sucker for ice cream.
Since you are only using a mixer for a minute, how about a big wooden spoon, used energetically for two minutes? I have one of THOSE. 🙂 I think I have a hand mixer someone gave to me but I’ve still not turned it on.
I used a hand mixer for this 🙂 If you give the spoon version a try, let me know how it goes and I’ll update the article!
I’ve done it with a spoon now. It works fine – but you might not want to freeze it as hard. Generally a big wooden spoon has more oomph for mixing than a metal one does but a metal one will work. Could also use a whisk during the earlier stages.
And the best part is: it’s much healthier and likely cheaper than anything you’ll find in the grocery store! You’ll be able to pronounce every ingredient, rather than looking at an ingredients list that reads like a college chemistry exam. Yay!
This is awesome!! I love ice cream and now I can make my own.?
I have several old hand beaters. I’ll have to try this. Sounds great.
A teacher taught me you can make ice cream just using ziplock bags, a towel, salt, and ice, but it’s alot of work!
Put the ice cream ingredients in a small ziplock bag. Put that bag in a big ziplock bag with ice and salt. Wrap the big ziplock bag in a towel then shake it as long as you can. Then hand it to someone else toshake it as long as they can. Keep shaking it until it’s ice cream. It’s a good project for a group of around 4 or 5 kids.
My inherited hand mixer is a little larger. Long ago when I was a school age kid, Mom would mix up her huge ice cream recipe to fill up the center steel canister to be rotated inside a wooden bucket. I had the “privilege” of cranking the hand crank that spun the filled canister inside the layer of salted ice. Everything was non-electric except for purchasing the ice and keeping it cold until needed. Here’s a good description of that process:
https://www.newlifeonahomestead.com/how-to-hand-crank-ice-cream-maker-non-electric/
–Lewis
Hi
this is a nice pre shtf method of making ice cream…..
I make custard-based ice cream from time to time. I have used honey, and in another batch, brown sugar, in place of cane sugar. I also tend to use a tablespoon of vanilla extract, and 1/8 to 1/4 teaspoon of ground cinnamon when freezing the mix. My flavors, especially chocolate, pop with the cinnamon.
On one occasion I made chocolate ice cream using chocolate sauce, resulting in a soft-serve with lasting chocolate flavor and after-flavor. I just checked out the sauce recipe and look forward to trying it out.
Thank you for this post.
I saw this blog post after I tried making ice-cream for the first time with a different recipe. I used just four ingredients: cream, condensed milk, vanilla extract, and peaches (of which I had an excess). Mine turned out OK. I would say that it is important to chop fruit into small pieces and squeeze out the excess water. The water in the fruit makes ice crystals, which ruins the “creamy” texture of the ice-cream.